The original Canadian Poutine was invented in Quebec and was a meat-based gravy with cheese curds over french fries. We can do better!! Serve this vegan poutine over roasted potatoes or a variety of roasted veggies!
I’ve been using this tried and true cheezy sauce recipe for so long I couldn’t remember if it was my creation or from someone else. I suspected it might be a Joanne Stepaniak recipe so I checked it out and sure enough this sauce recipe is from her book, The Saucy Vegetarian. Joanne is also the author of The Un-Cheeze Cookbook and many other great vegan books. Check them out to add to your collection!
2 Tbsp white onion, (chopped if using a hand blender)
2 Tbsp miso (I use a sweet light miso, but any will work)
½ tsp salt
NOTE: For orange colored sauce (more “cheddary” looking) add ¼ cup pimento pieces, or raw or roasted red bell peppers, or ½ shredded carrot, and reduce water to ⅓ cup.
Directions:
NOTE: Poutine gravy-sauce can be made in advance and given a quick whisk, or pulse, before serving.
Place all ingredients in a food processor or blender, and process well until creamy and smooth, one to two minutes, until creamy.
There is no need to heat the sauce if veggies, pasta, or whatever you're pouring it onto ...is piping hot. Otherwise you can either let your blender run until it heats sauce (if it has that feature) or scoop it into small saucepan to warm, whisking often. NOTE: If you heat the sauce too long it will thicken so may need a splash or two of water to thin. Serve in a gravy boat for individuals to serve themselves.
Leftovers make delicious toppings on rice bowls, veggies, tofu or tempeh.
Chutney is a traditional accompaniment to curry dishes that balances and cools. Topping Curry-in-a-Hurry with fresh coconut ginger chutney makes this quick curry dish special, so don’t leave it out… it takes only five minutes!
Coconut Ginger Chutney has a sweet and flavorful element that recipe testers said they not only enjoyed the first bites, but the lingering flavor too!
Add baked squash pieces, steamed carrot chunks, chopped tomato or chopped green onion (near the very end of simmering).
Directions:
In a heavy pot or skillet, sauté onions and garlic in water. When the onions are soft, add the salt and
spices and cook another minute or two, stirring.
Add the canned chickpeas and stir.
Use a hand blender to puree most of the mixture leaving some whole if you wish. (This step is optional if you would rather have the texture of the whole chickpeas. Traditional curry is typically pureed.)
SLOW COOKER OPTION:Sauté onion and garlic (as above). Place all other ingredients in a Slow Cooker. Simmer on low for 6-7 hours, or high for 2-3 hours. Puree with hand blender.
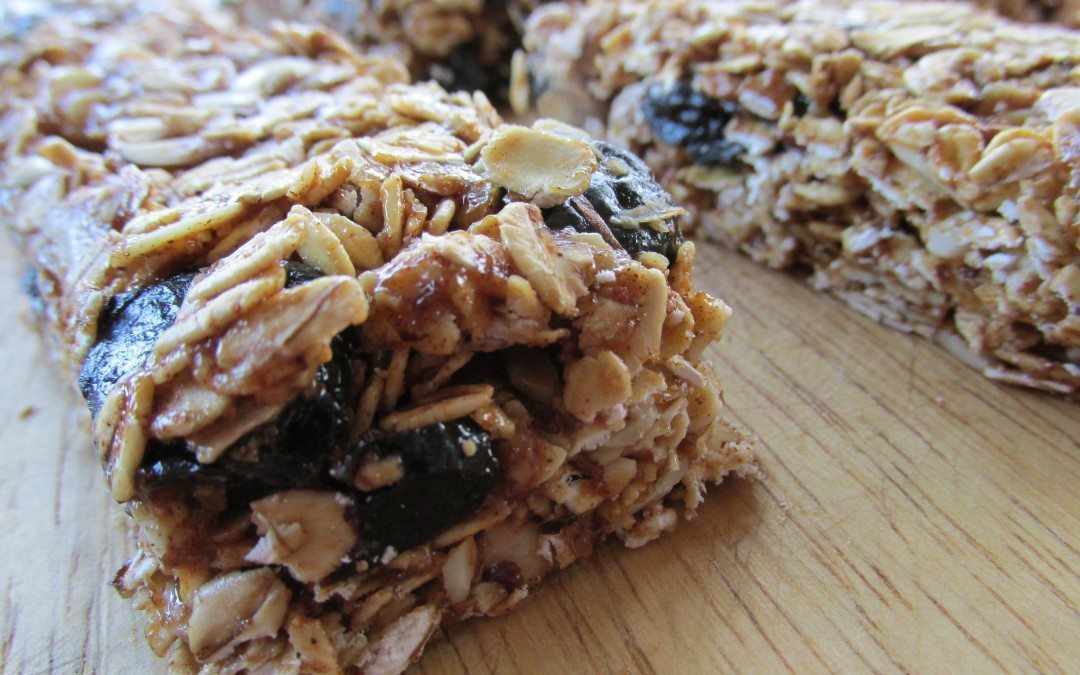
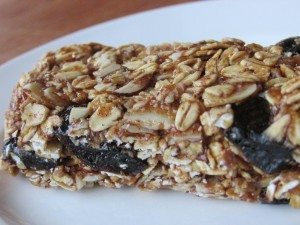
Whip up a batch of no-bake granola bars and you’ll have numerous snacks and quick breakfasts ready to go! Change up the fruits, nuts, and seeds for variety with each batch.
3/4 cup dark liquid sweetener (dark agave, maple syrup, or brown rice syrup)
¼ cup nut butter (almond, cashew, peanut butter, tahini, etc.)
3 cups rolled oats (or quick oats, however, rolled oats are best)
1 cup dried fruit (cherries, cranberries, blueberries, raisins, or chopped apricots)
1 cup nuts or seeds (slivered almonds, pumpkin seeds, coconut flakes, sunflower seeds, etc.)
pinch salt
OTHER:
GF vegan chocolate
lemon zest
candied ginger
dried spices or herbs
Directions:
Prepare a 9”x 9” baking sheet or pan with parchment paper.
In a food processor or blender, process 1 cup of the rolled oats into oat flour.
In a large pan over medium heat, warm syrup until bubbly. Lower heat if it’s boiling too high in the pan. Allow to simmer for about 2 minutes. (Simmering for a few minutes is what allows the sweetener to bind the ingredients so they won’t crumble.)
Whisk in the almond butter.
Turn off the heat.
Add the rolled oats, oat flour, dried fruit, nuts, and spices. Mix well.
Immediately press firmly into baking sheet or pan. Cool before cutting into bars with a sharp knife if you want them to be dry enough not to be too sticky. (Place in fridge for at least 30 minutes or an hour on the counter, minimum.)
Cut into desired size. (If you want them to fit into snack-size bags or specific containers, cut into appropriate shape and size.)
Wrap individual bars in parchment paper and tuck into a snack-size ziplock bag if you want quick grab-and-go bars.
Keep refrigerated or store in a cool place.
OPTIONAL: Dip into melted 85% dark, vegan chocolate for a decadent treat! Allow to set.
½ cup slivered almonds, chopped or pulsed in grinder
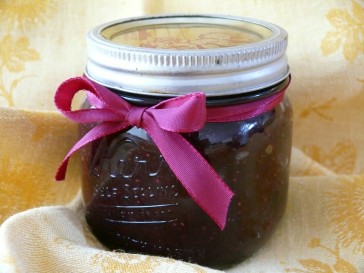
½ cup fruit jam, your choice!
Directions:
Preheat oven to 350°F.
Line cookie sheets with parchment paper.
Prepare almond coating by finely chopping with a knife or pulsing in a spice or nut grinder. Place in a suitable bowl for rolling dough balls.
Mix together dry ingredients.
Cream nut butter, syrup and almond extract.
Add dry ingredients and combine well. The dough will be sticky.
Using moistened hands, form 1” balls. Roll each ball in chopped almonds. Press gently with thumb to make a dent on top of cookie. Set each cookie on cookie sheet.
Bake for 12-15 minutes until lightly browned.
Cool completely and fill with your choice of jam or fruit butter!
So simple! So delicious!! Chia seeds not only thicken fruit to make jam, they provide omega 3 fatty acids and lots of dietary fiber to your breakfast, snacks, or treats!
Hi, I'm Victoria Laine, whole-food educator, author, and health blogger.
My website is the home of all things delicious and nutritious, celebrating the pleasure of food and well-being.
You'll find recipes, menus, books, and courses, as well as private nutrition counseling for Celiac disease, inflammatory conditions, allergy eating, plant-based lifestyles, and more.
I'd love to hear from you if you have questions or suggestions!